
As my son is getting older, he is showing more and more curiosity towards pushing buttons and switches. I’ve seen both homemade and produced products like “button boards” and “switch boards” available, but figured I could build a nice one for cheaper.
He is really into the push button type switches, so I figured I’d create some sort of board or box with lots of momentary and push to click switches that would control some leds on the box itself.
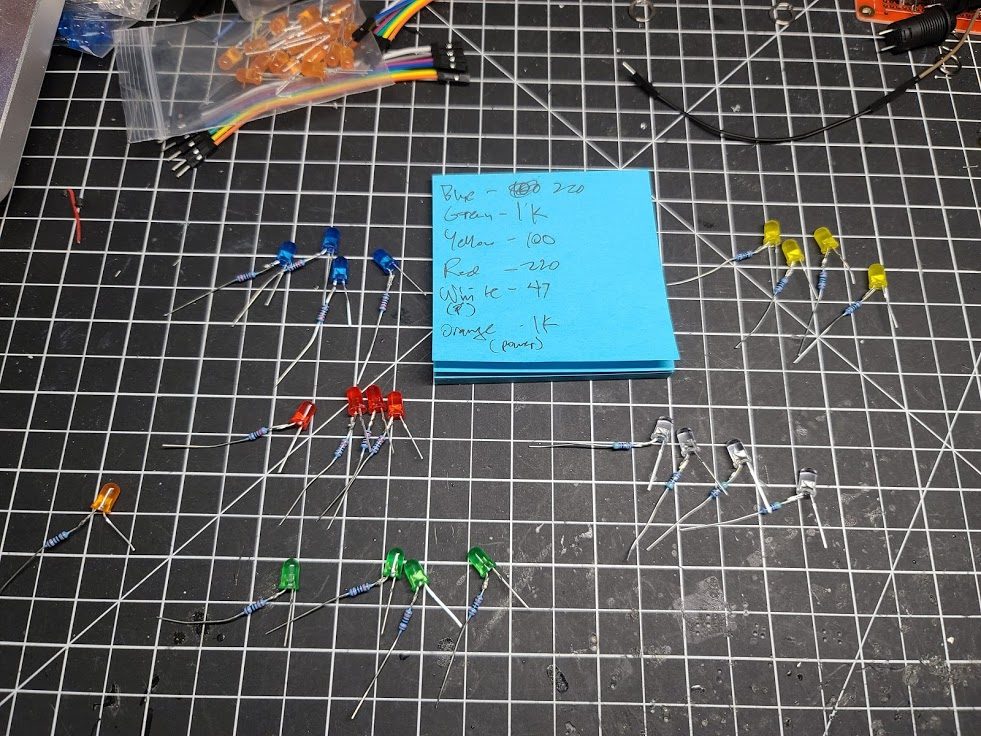
I started off by mounting a few CR123 battery holders to an old breadboard I had. Since the CR123 batteries are 3v, I ordered some LEDs that were all around the 3v operating range. Some of them were less, but I could use larger resistors to bring the voltage down for those leds. In this picture, I soldered some pin headers to the board for the positive and negative lines of the board so I could test different resistors with different LED colors

After a lot of testing and determining what looked best, I selected resistor values for each color LED that didn’t look like they would be too bright and blinding to a small child. I then soldered each resistor to the LEDs I was going to use for the project so I wouldn’t lose track of the tiny resistors.
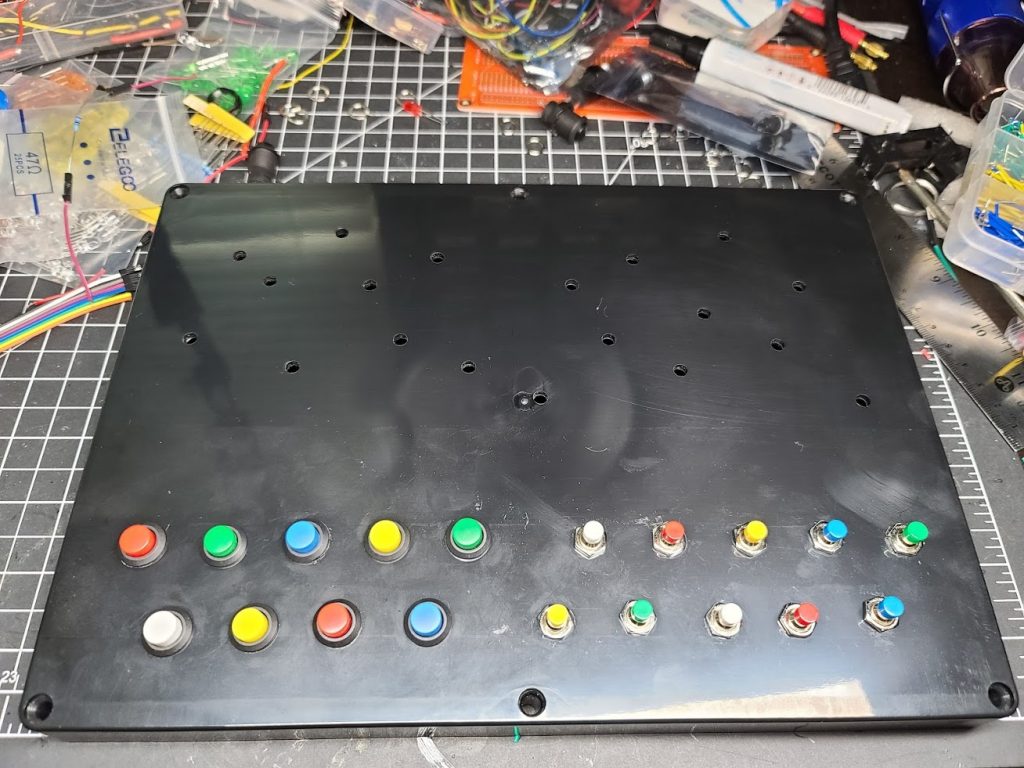
Now it was time to layout my box for all the switches and LEDs. I started by creating a graph on the box and randomly laying out LEDs on the top, and lining up the switches on the bottom

Next I drilled out all the holes to the correct dimensions for the LED (5mm), momentary switches (7mm) and push to lock switches (12mm)

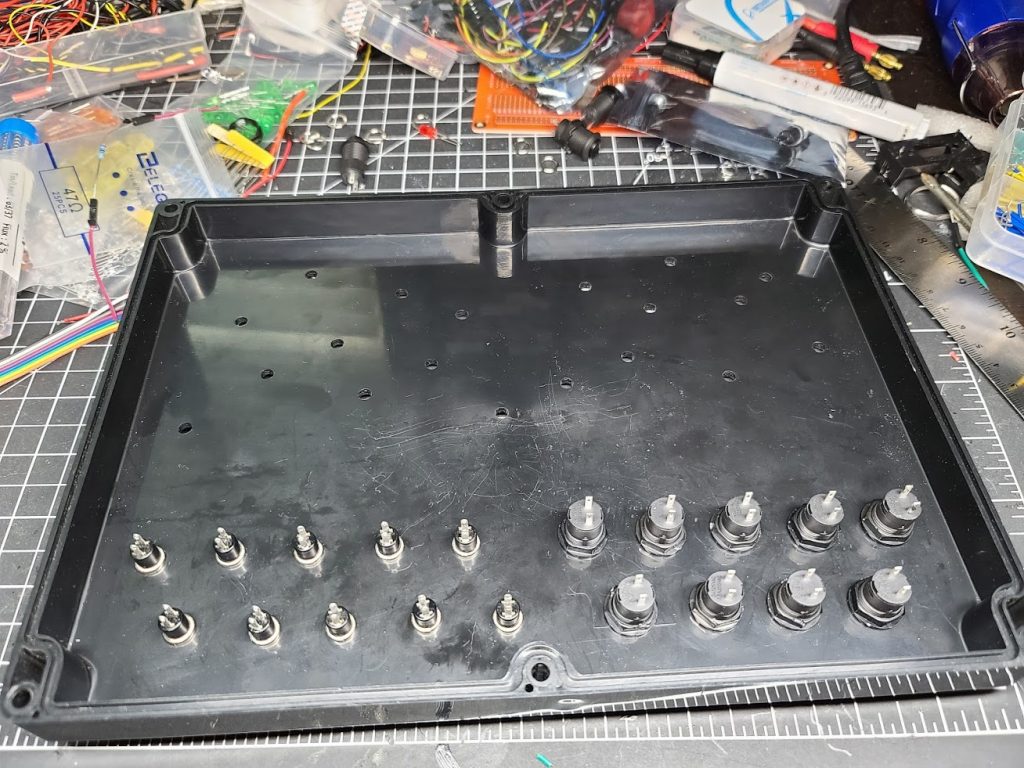
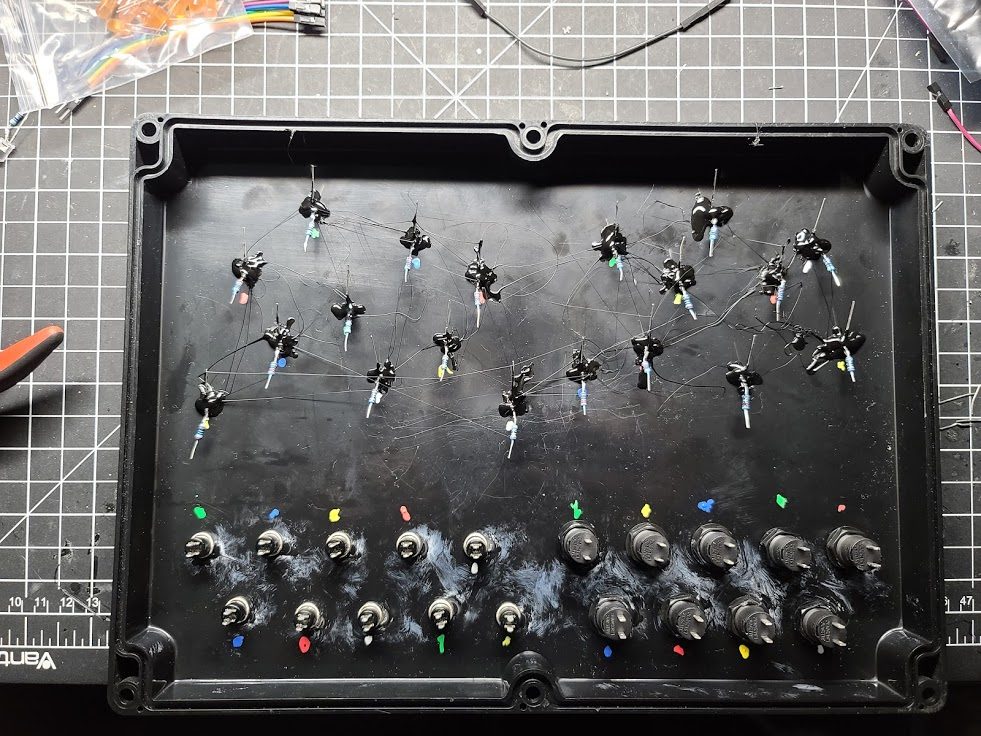
After the holes were drilled, I could then mount the switches, lining up the pins on the switches to make soldering easier
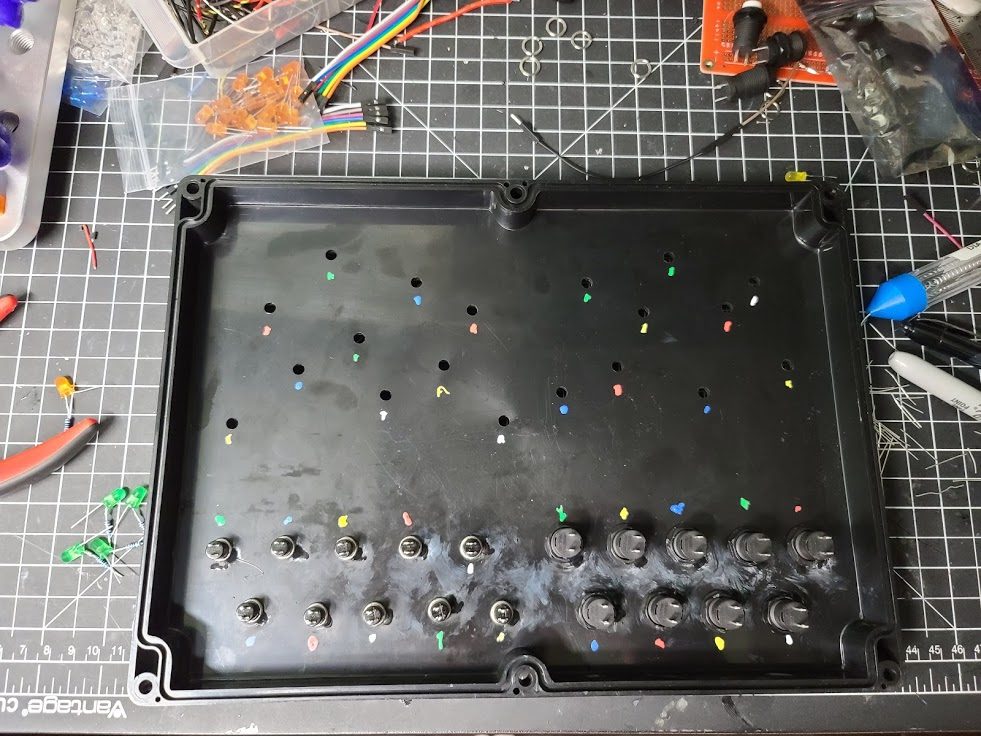
Next step was to do some design on where I wanted the specific colors of the LEDs to be placed. I wanted the switches to light up a LED of the same color, but I didn’t want the LEDs to be directly in line with the switch for a bit of randomness.
Once laid out, I hot glued the LEDs in place with black hot glue.

Next I mounted the breadboard into the bottom of the project box and wired up a single switch and LED to be the overall on/off switch for the whole box. I also wired up a quick disconnect plug for the power leads, so I could disconnect the whole lid when it was unscrewed.


Time to wire up the LEDs! I started with the negative lead and used some silicon coated wire here. The approach I used was to strip out a tiny bit of the insulation in line in the wire, and then wrap the wire around the negative LED lead and finally solder the wrap. This worked out well, rather than cutting a bunch of leads and soldering them all together.


I used the same approach with the switches, but instead of wrapping around the switch pole, I squeezed the pole into the strands of wire and then soldered the leads. Note – I used black wire here for the switches, because I ran out of red… The switch essentially interrupts the positive voltage coming from the battery to the LED.

After wiring up the positive leads from each LED’s resistor to the other pole of the switch, my wiring was complete!

Just to be safe, I completely doused all the open solder connections with liquid electrical tape on both sides of the box. I figured this box would be in for a rough ride, and didn’t want to risk shorting out any of the CR123 batteries.


And voila! we are finished. My son loves pushing the buttons and watching the LEDs light up!


List of purchases for this project:
Amazon
| Qty | Product | Price | Notes |
|---|---|---|---|
| 1 | Cylewet 12Pcs 12mm Self-Locking Latching Push Button Switch | $6.99 | |
| 1 | Cylewet 12Pcs 1A 250V AC 2 Pins SPST Momentary Mini Push Button Switch | $5.89 | |
| 1 | LeMotech ABS Plastic Electrical Project Case Power Junction Box, Project Box Black | $21.97 | I ordered the 290 x 210 x 100mm box, but it doesn’t seem to be available at the current time |
| 1 | LampVPath (Pack of 5) CR123A Battery Holder Box Clip Case with PCB Solder Mounting Lead | $6.99 | |
| 1 | 160 pcs 5mm LED Diodes, Round Head DIY Electronic Component LED Diode Lights | $6.99 | |
| 1 | Gikfun Large Solder-able Breadboard Gold Plated Finish Proto Board PCB DIY | $13.68 | |
| 1 | Elegoo 17 Values 1% Resistor Kit Assortment, 0 Ohm-1M Ohm (Pack of 525) | $13.99 |